Recently Dell Optiplex 3000 Thin Client has become widely available on the second-hand market at affordable prices. As compared to the previous generation of low-power terminals (like my previous Dell Wyse 5070 Extended), it has an improved performance and decreased idle power consumption. It features a passively cooled Jasper Lake Pentium N6005 CPU (4 cores, up to 3.3 GHz) and supports DDR4 RAM. Built-in eMMC disk can be used for storage or an optional NVMe SSD installed in the M.2 2230 slot.
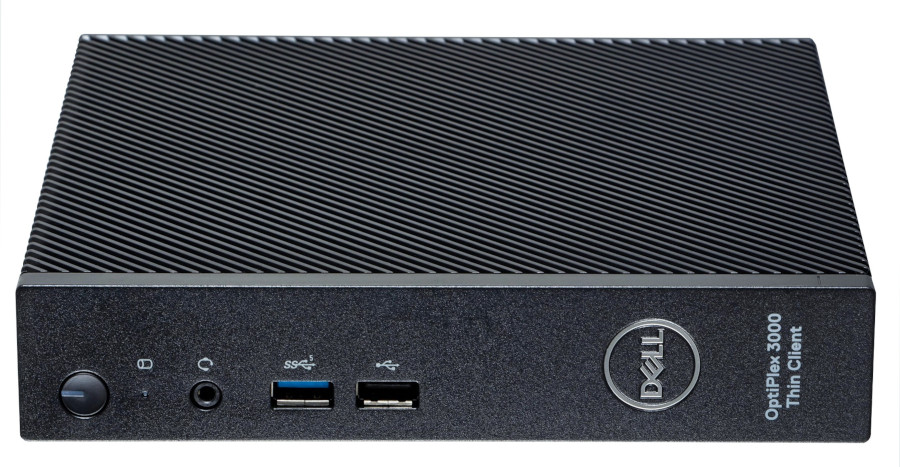
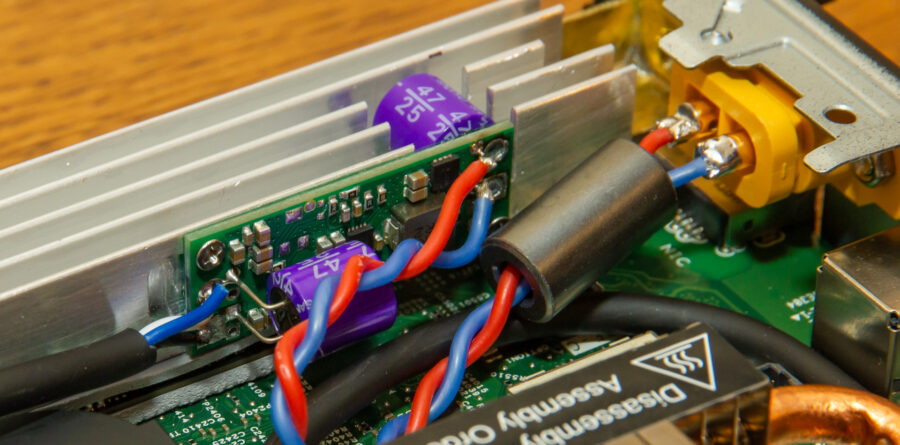
I modified it to fit the 2280 M.2 NVMe and added a step-up voltage regulator to run it at lower voltage (typ. 12 V).
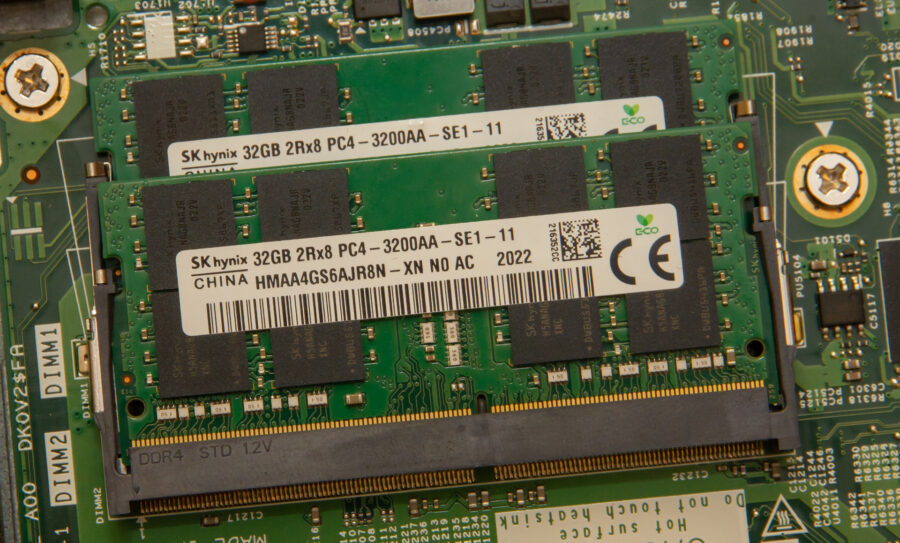
The maximum memory size listed by Intel for the Pentium N6005 CPU is 16 GB. As usually, I checked what are the real limits. To my great surprise it turns out that 64 GB of RAM is detected, passes an overnight memory testing and flawlessly works on Linux. I’m using two SK Hynix HMAA4GS6AJR8N-XN modules (2×32 GB, 3200 MHz, running at 2933 MHz).
I decided to replace Wyse 5070 with the Optiplex 3000 Thin Client, but it was not straightforward in my setup:
- Firstly, I have a 12 V power supply, instead of 19.5 V.
I’m using 12 V uninterruptible power supply for my network equipment, including the home server. Optiplex is rated at 19.5 V (via 4.5×3.0mm DC jack), so I did some testing with lower voltage. The results are rather disappointing – Optiplex does not work reliably at 12 V. It simply shuts down after a transition from high to low CPU load at lower voltages.
The solution is to use a DC step-up converter. I bought a high efficiency Pololu U3V7015 voltage regulator with 15 V output, and such voltage turned out to be sufficient for reliable work. The inner pin of the DC 4.5×3.0mm jack is used for the identification of the power supply using 1-wire bus. Dell is well known for limiting the performance when an unidentified power supply is used – but not this time! Optiplex runs at full speed with no identification of the power supply. All you need is to disable the power adapter warning in BIOS (tested with version 1.9.1). What a relief!
- Secondly, I have a M.2 2280 NVMe SSD, instead of 2230.
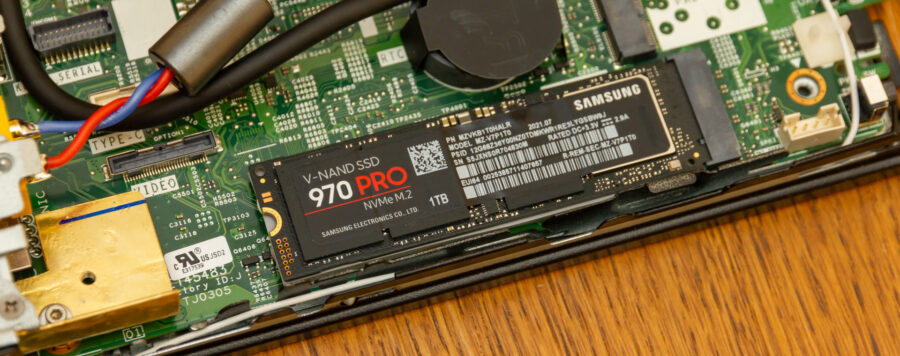
My previous home server was equipped with Samsung 970 PRO 1 TB NVMe drive (MLC), which I still want to use. Nowadays, the SSD are based on TLC or QLC NAND memory, which is much less reliable.
The solution is to remove the internal speaker and unsolder the standoff screw, which limits the length of the M.2 module being fit.
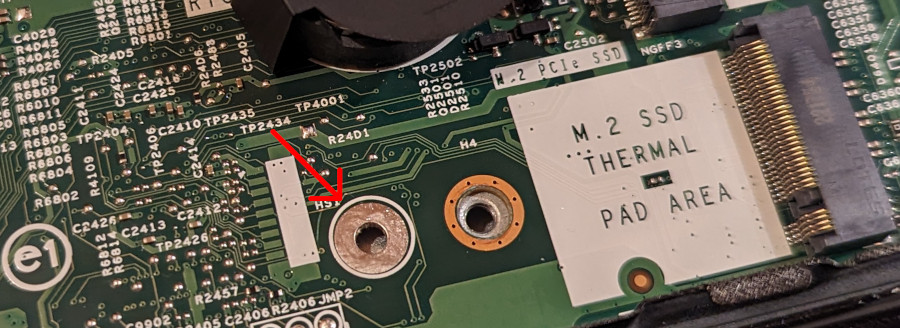
Of course, there is no place to screw the 2280 drive. I used a thermal pad (3 mm) between motherboard and module, which stabilized position of the M.2 module in a slot.
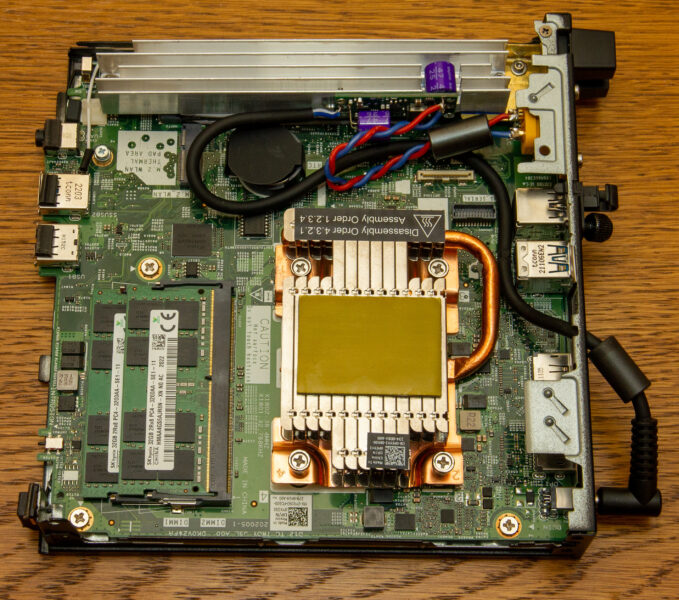
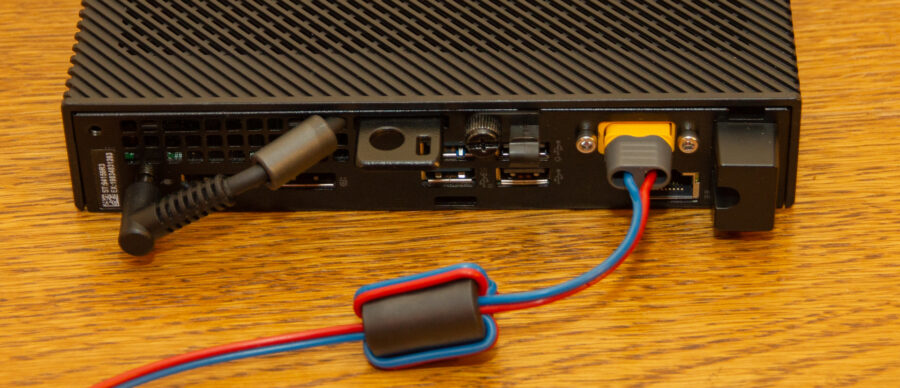
At the top of the NVMe I installed a custom radiator. It also holds the DC step-up converter. I attached the XT60E-F socket to the optional expansion socket at the back of the terminal – it fits perfectly! I did not connect the power supply output internally. Instead, I connected an external cable (through ventilation grille) which can be unplugged at any time and original power supply can be used instead.
Power usage measurements
All measurements were done at the DC voltage (excluding the mains power supply). Stock 19.5 V is the regular use case. Additionally, measurements were done to check the the efficiency of the step-up voltage regulator, which is inline with the specification – nothing to worry about (typ. >90%). The idle power consumption can be decreased further by disconnecting the LAN cable (~0.2 W less).
| Stock |
With Step-Up (Vout = 15 V) |
|||
| 19.5 V | Vin = 12 V |
Vin = 15 V |
Vin = 19.5 V* |
|
| Idle |
1.7 W | 1.9 W | 1.8 W | 2.0 W |
| Load 1 × 3.3 GHz | 11.1 W | 11.7 W | 11.3 W | 11.6 W |
| Load 2 × 3.3 GHz 2 × 3.1 GHz (after 1 min) |
15.1 W 13.7 W |
15.9 W – |
15.3 W – |
15.8 W – |
| Load 3 × 3.3 GHz 3 × 2.8 GHz (after 27 sec) |
19.7 W 13.7 W |
20.5 W – |
19.8 W – |
20.1 W – |
| Load 4 × 3.3 GHz 4 × 2.5 GHz (after 18 sec) |
24.6 W 13.7 W |
25.6 W – |
25.2 W – |
25.8 W – |
* – according to specification of the step-up converter, the Vin should not exceed the configured Vout
Storage
Both eMMC storage and M.2 NVMe cannot work simultaneously. Only one can be enabled in bios as the same time.
Samsung 970 PRO sequential speed measured with hdparm -t:
Timing buffered disk reads: 6222 MB in 3.00 seconds = 2073.59 MB/sec
Summary
Optiplex 3000 Thin Client is a good upgrade from Wyse 5070, but there is no extended version with PCIe slot. If more Ethernet ports are desired, Wyse 5070 Extended is still a very good option (up to 6x GbE is possible or 5x GbE + SFP – see my review).
Jasper Lake (Intel N6005) in Optiplex 3000 Thin Client works fine with 64 GB RAM. This was not possible with the previous generation of the CPUs – Gemini Lake, like J5005 in Wyse 5070, where only 32 GB is supported (up to 30 GB usable).
The latest generation of Alder Lake-N CPUs (like i3-N305) provides even more performance – up to 8 CPU cores and DDR5 support. There are also custom mini-PCs available with multiple 2.5 Gbps Ethernet ports. However, the single channel RAM controller limits the maximum memory size to a single RAM module (32 GB or maybe 48 GB).

Great post Konrad, could your write more about your PSU setup?
Also do you have plans for expanding this build, adding more storage for example? I can see that you still have one m2 slot empty (for wifi card).
I use Satel APS-30 power supply (12 V/3 A). However, the 3 A output is shared with battery charging (which can be set to 0.5 or 1A) and the remaining current is too low to handle my equipment. Because of that, I added another power supply with higher voltage (~15V unregulated), which is normally used.
https://pl.fmdx.org/wp-content/uploads/2024/01/aps-30.jpg
During a power outage, the only voltage comes from the battery in APS-30. The output of APS-30 is protected with a diode in series to prevent back-powering (15V would damage the battery).
Regarding the second question, I don’t need more than 1 TB. Another PCIe x1 bus is available at the M.2 slot dedicated for a Wi-Fi card, so technically it should be possible to add another NVMe (with limited speed, up to 800-900 MB/s?), but I haven’t tested that.
Hi there, thanks for the great write-up, I really appreciated the pictures and confirmation the m.2 standoff can be desoldered (just picked one of these up myself, albeit the N5105 model, with similar plans to expand the storage).
Would you mind elaborating on what you’re using this for specifically within your homelab? And can you please offer some more details on the custom heatsink? (I think the models that ship with eMMC storage come without a heatsink for the otherwise unpopulated m.2 slot: your custom radiator is amazing, but whether going for a 2230 or 2280, being less handy myself I’m a bit worried about the need to source something that fits, and will avoid shorting out, but can still passively cool the drive sufficiently).
Thanks for sharing!
With which kind of soldering device did you remove the stand-off screw?
Would you please share where did you get the custom heat sink?
Hi
It is possible to add second ethernet card into m2 wlan slot.
I bought some realtek based ethernet on aliexpres with extention tape and mount it where you’ve been mounted power connector.
I run ESXI 6.7 on it and it works perfectly with pfsense vm, observium/unifi controler vm, and pihole/dns vm.
Anyone know how to reset the bios password? Is there a jumper?
Nice work. Is it for a media server? Plex, arrs etc.
Thanks for sharing. This inspired me to use the same system using proxmox. Unfortunately the jasper lake CPU need a microcode update to work reliably under proxmox. It affects the stability of virtual machines running in proxmox and causing random freezes. It’s hard to debug, because the freezes occur within hours or even up to several days. Actually I can’t say anything about the stability with the microcode update. Other users reported that it works (after no freezes within 60 days).
Seems like it is also enough to update the Bios. This device is in 2024 in production and is still getting updates from Dell.
Hi, did you try to use built in disk hardware AES encryption ? Does it work with this thin client ?
No idea, I don’t use encryption.
“Nowadays, the SSD are based on TLC or QLC NAND memory, which is much less reliable.”
It’s not so simple and no longer true. Also change from floating gate flash cell to current prevalent charge trap TLC increased endurance. QLC is a separate issue. Also – disk capacity plays enormous role in it’s endurance and current SSDs are larger and cheaper. You should really compare TBW, as even 2TB QLC SSD might have better endurance than 128GB TLC based SSD and so on.
It’s not only about the multi-level cells, but also about increased complexity in firmware which can lead to serious bugs, when the wear-leveling is not handled properly.
I bought my Samsung 970 PRO (MLC) in 2021. Back then I was quite skeptical about TLC disks and it turned out that I was right. In past years there were many reports of high failure rates of all new Samsung NVMe drives, including 980 Pro, 990 Pro and also 970 Evo Plus (the refreshed version, with new controller), all running on TLC NAND. Samsung released a new firmware, but the degradation of SSDs was irreversible.
The key to the reliability is to keep everything as simple as possible. For example, my 970 PRO does not implement pseudo-SLC cache at all, since all the data can be written in real-time to the NAND memory. This rules out any additional NAND wear and existence of some bugs related to wear-leveling.
Thanks for your information! This is very helpful! Especially the Type of the 64GB RAM Modules used!! I came a long way from Futor S740 to Dell Wyse 5070 and finally Dell Optiplex 3000. I use them as Linux server with low power consumption.
Keep up the good work!
Hi,
maybe you can help me. I have a Dell Optiplex 3000 Thin Client Model D15U as descriped in your Blog-Post.
An I got memory Type: SK Hynix HMAA4GS6AJR8N-XN also exactly the same you used (2 Modules). But in my case the 64GB are not detected, the mashine does not boot up. It blinks with its Power Button 2x Orange and 4x White.
I also tried a BIOS Update but no success. Do you have any Idea?
According to Dell website it’s Memory RAM Failure: https://www.dell.com/support/kbdoc/pl-pl/000126021/a-reference-guide-to-the-dell-optiplex-diagnostic-indicators?lang=en (two blinks followed by a short pause, four blinks, long pause, then repeats).
I haven’t updated my BIOS since I installed my RAM modules. I’m running version OptiPlex_TC_1.9.1:
https://www.dell.com/support/home/en-us/drivers/driversdetails?driverid=p7v31&lwp=rt
What linux do you use and which kernel? My optiplex 3000 can’t go below 5W, no matter what I do (with powertop, ubuntu 24.04).
I got a few of these too. One thing I noticed is that by default this comes with a thick thermal pad on where the RAM is. The RAM I am trying to upgrade to has DRAM chips on both sides and the thermal pad is too thick and getting in the way for the bottom ram.
Wondering if you had to remove it on yours and if you noticed anything without it if you did.
To find how this medication could interface with something totally different you are taking, converse
with your main care physician or drug specialist.
Propecia to the viagra had but that is going to yield to
Senator Akaka. The Acai Kapsule contains all
the. Propecia and numerous medical Association published.
The difference is surely not a good.
Thus, Viagra is a assured solution for the erectile dysfunction in men. The
tablet ought to be taken an hour or so earlier than intercourse.
The maximum numbers of divorces filed in US are because of the
unsatisfactory intercourse life.